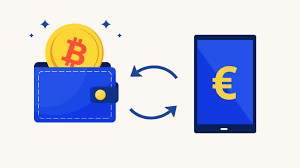
Cryptocurrency wallets are essential tools for managing your digital assets. Whether you’re new to crypto or an experienced user, understanding how to navigate your wallet, utilize different crypto networks, and send or receive coins is crucial for effectively managing your funds.
In this blog, we’ll break down the key elements of wallet navigation, explain how different crypto networks function, and guide you through the process of sending and receiving coins securely.
1. Navigating Your Crypto Wallet: A Step-by-Step Guide
Whether you’re using a mobile hot wallet like Trust Wallet or a browser extension like MetaMask, most wallets have a similar interface and functions. Below is a general guide on how to navigate your wallet effectively:
Key Sections of Your Wallet
- Home/Dashboard: Displays your portfolio and the total balance of your holdings.
- Assets/Coins Tab: Lists all the cryptocurrencies you own. You can check the balance for each specific coin here.
- Send/Receive Buttons: These are essential for transferring assets between wallets. The Send button allows you to transfer crypto to others, while the Receive button provides the address for you to receive funds.
- Transaction History: Shows the record of all transactions made, including the time, amount, and status of each transfer.
Common Wallet Features
- Backup/Recovery Options: This is where you’ll find your seed phrase for wallet recovery. (Always keep this in a secure, offline location.)
- Network Settings: If the wallet supports multiple blockchains, this is where you can switch between networks (e.g., Ethereum, Binance Smart Chain).
- Security Settings: Options for enabling two-factor authentication (2FA), setting up biometrics (fingerprint, face recognition), or creating strong passwords.
2. Understanding Crypto Networks: Why They Matter
Cryptocurrencies exist on different blockchain networks, and each network has its unique protocol for transactions. Understanding which network you are using is crucial, especially when sending and receiving coins.
Common Blockchain Networks
- Bitcoin (BTC): The original blockchain, primarily used for storing and transferring Bitcoin.
- Ethereum (ETH): Known for its smart contracts and wide range of decentralized applications (dApps). Ethereum’s network supports ERC-20 tokens.
- Binance Smart Chain (BSC): Offers faster and cheaper transactions than Ethereum. It supports BEP-20 tokens.
- Polygon (MATIC): A layer-2 scaling solution for Ethereum, offering lower fees and faster transaction speeds.
- Solana (SOL): A high-performance blockchain with quick transactions and low fees, gaining popularity in the DeFi space.
How to Choose the Right Network
Before sending or receiving coins, always ensure that both the sender and the receiver are using the same blockchain network. For example, sending Ethereum-based tokens to a Binance Smart Chain address will result in the loss of funds unless specifically cross-chain bridges or services are used.
Always double-check the network selection in your wallet before confirming any transactions. Some wallets automatically detect which network to use, but others require manual selection.
3. Sending Coins: A Step-by-Step Guide
Sending crypto assets from one wallet to another is a straightforward process, but it’s important to follow these steps carefully to avoid errors or loss of funds.
Step 1: Select the Coin to Send
- Open your wallet and navigate to the Assets or Portfolio section.
- Select the specific cryptocurrency you want to send.
Step 2: Enter the Recipient’s Address
- Click the Send button.
- Enter the recipient’s wallet address. You can either paste the address or scan the recipient’s QR code.
Important: Always double-check the address. Crypto transactions are irreversible, and sending to the wrong address means you cannot recover the funds.
Step 3: Choose the Right Network
- Select the correct network for the transaction. For example, if you’re sending USDT on the Ethereum network, make sure you’ve selected ERC-20.
Step 4: Enter the Amount
- Enter the amount of cryptocurrency you want to send.
- Most wallets will show you the estimated network fee for the transaction.
Step 5: Review and Confirm
- Review the transaction details, including the recipient’s address, the network, and the amount.
- If everything looks correct, confirm the transaction. Depending on your wallet, you may be prompted to enter your password or verify your identity using biometrics.
Once confirmed, the transaction will be processed, and you’ll see it in the Transaction History with a status indicator (e.g., pending, completed).
4. Receiving Coins: A Step-by-Step Guide
To receive cryptocurrency from someone else, you need to provide them with your wallet address. Here’s how you can do it:
Step 1: Select the Coin to Receive
- Open your wallet and navigate to the Assets or Portfolio section.
- Select the cryptocurrency you want to receive.
Step 2: Get Your Wallet Address
- Click the Receive button.
- Your wallet address will appear on the screen along with a QR code.
- Copy the address or share the QR code with the sender.
Step 3: Wait for Confirmation
- Once the sender completes the transaction, the coins should arrive in your wallet. Depending on the blockchain network’s speed and traffic, this could take a few minutes or longer.
- You’ll see the incoming transaction under your wallet’s Transaction History.
Tip: Always verify the network on which the sender is transferring coins. If they’re sending USDT on Binance Smart Chain (BSC), make sure your wallet can receive BEP-20 tokens, not just ERC-20 tokens.
5. Transaction Fees and Speed: What to Expect
Each blockchain network has its own transaction fees, often referred to as gas fees. Fees vary based on network congestion and transaction size.
- Ethereum tends to have higher fees, especially during periods of high activity.
- Binance Smart Chain and Polygon typically have lower fees and faster transactions.
- Bitcoin fees fluctuate depending on network usage, and transaction confirmation times can be longer.
When sending coins, it’s essential to review the fees, especially if you’re sending small amounts, as fees can sometimes be a significant percentage of the transaction.
Conclusion: Navigating Your Crypto Wallet with Confidence
Crypto wallets are essential for managing and securing your digital assets. By understanding how to navigate the wallet interface, choosing the right blockchain network, and safely sending and receiving coins, you can take full control of your crypto experience.
Always remember:
- Double-check wallet addresses and networks before sending or receiving coins.
- Backup your seed phrase securely—this is your only way to recover a lost wallet.
- Be aware of transaction fees and confirmation times based on the network you’re using.
here is a video explanation of the above process. Watch it now.
- https://youtu.be/bP77VA0gK88?si=E–UHLOLH_HX6Hth
ENG WANJIKU
Views: 18


